Scheduled events are suppose to happen at regular intervals based on a rule set. Scheduled events are used to execute Lambda function after an interval which is defined in cloudwatch services. They are best used for working on cron jobs along with AWS Lambda. This chapter will explain with simple example how to send mail after every 5 minutes using scheduled events and AWS Lambda.
RequisitesThe requirements for using Lambda function with Scheduled events are as follows −
- Verify email id using AWS SES
- Create Role to use AWS SES, Cloudwatch and AWS Lambda
- Create Lambda Function to send email
- Add rule for scheduled events from AWS CloudWatch
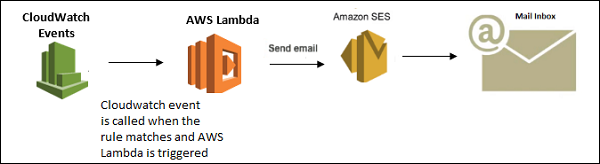
The example that we are going to consider will add CloudWatch event to the AWS Lambda function. Cloudwatch will trigger AWS Lambda based on the time pattern attached to it. For Example, in the example below we have used 5 minutes as the trigger. It means for every 5 minutes, AWS Lambda will be triggered and AWS Lambda will send mail whenever triggered.
The basic block diagram for the same is shown below −
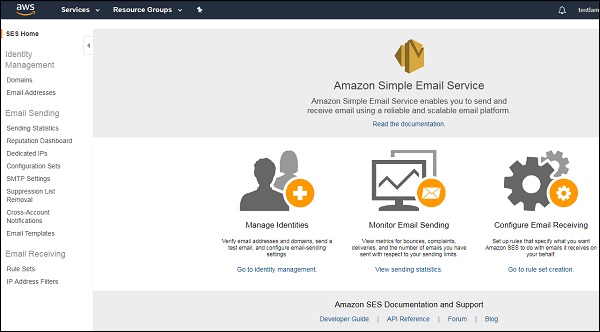
Log in to AWS and go to AWS SES service as shown below −
Now, click Simple Email Service as shown −
Click Email Addresses on left side as shown −

It displays a button Verify a New Email Address. Click it.
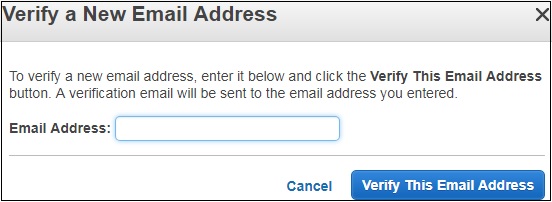
Enter Email Address you want to verify. Click Verify This Email Address button. You will receive mail from AWS on that email id with email subject: Amazon Web Services – Email Address Verification Request in region US East (N. Virginia)
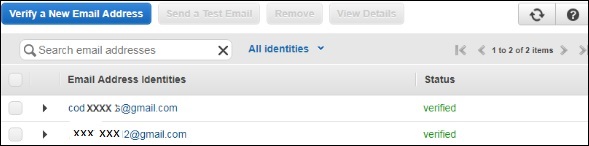
Click the link given in the mail to verify email address. Once verified, it will display the email id as follows −
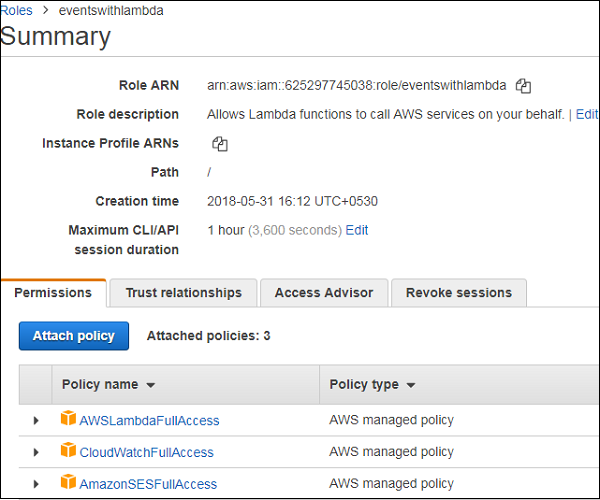
You can also create a role which gives permission to use the services. For this, go to IAM and select Role. Add the required policies and create the role. Observe that the role created here is events with lambda.
You will have to follow the steps to create Lambda function using runtime as nodejs.

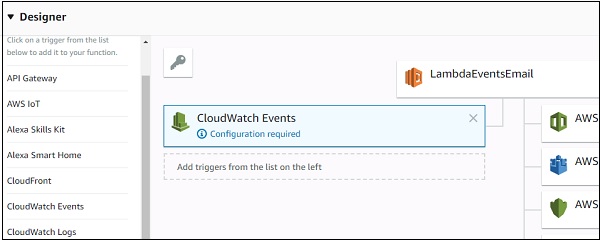
Now, add trigger to Lambda as shown −
Add details to CloudWatch Events Trigger as shown below −
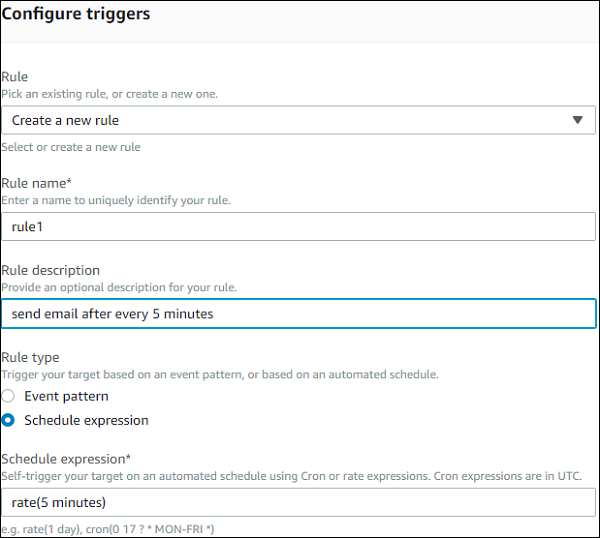
Note that the event will be triggered after every 5 minutes as per the rule trigger created.
The Lambda code for sending an email is given below −
var aws = require('aws-sdk');
var ses = new aws.SES({
   region: 'us-east-1'
});
exports.handler = function(event, context, callback) {
   var eParams = {
      Destination: {
         ToAddresses: ["xxxxxxxt12@gmail.com"]
      },
      Message: {
         Body: {
            Text: {
               Data: "this mail comes from aws lambda event scheduling"
            }
         },
         Subject: {
            Data: "Event scheduling from aws lambda"
         }
      },
      Source: "coxxxxxx@gmail.com"
   };
   console.log('===SENDING EMAIL===');
   var email = ses.sendEmail(eParams, function(err, data) {
      if (err) console.log(err);
      else {
         console.log("===EMAIL SENT===");
         console.log("EMAIL CODE END");
         console.log('EMAIL: ', email);
         context.succeed(event);
         callback(null, "email is send");
      }
   });
};
Now, we need the AWS SES service. You can add this using the code shown as follows −
var aws = require('aws-sdk');
var ses = new aws.SES({
   region: 'us-east-1'
});
To send mail from nodejs, we have created eParams object which has details like the example mail, to mail id and the body with message as follows −
var eParams = {
   Destination: {
      ToAddresses: ["xxxxxxxx12@gmail.com"]
   },
   Message: {
      Body: {
         Text: {
            Data: "this mail comes from aws lambda event scheduling"
         }
      },
      Subject: {
         Data: "Event scheduling from aws lambda"
      }
   },
   Source: "coxxxxxx@gmail.com"
};
The Lambda code to send email is as follows −
var email = ses.sendEmail(eParams, function(err, data) {
   if (err) console.log(err);
   else {
      console.log("===EMAIL SENT===");
      console.log("EMAIL CODE END");
      console.log('EMAIL: ', email);
      context.succeed(event);
      callback(null, "email is send");
   }
});
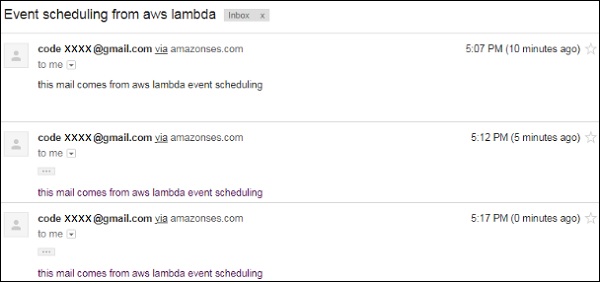
Now, let us save this Lambda function and check the email id for mails. The screenshot shown below shows that the mail is sent from AWS Lambda after every 5 minutes.
Comments
Post a Comment